
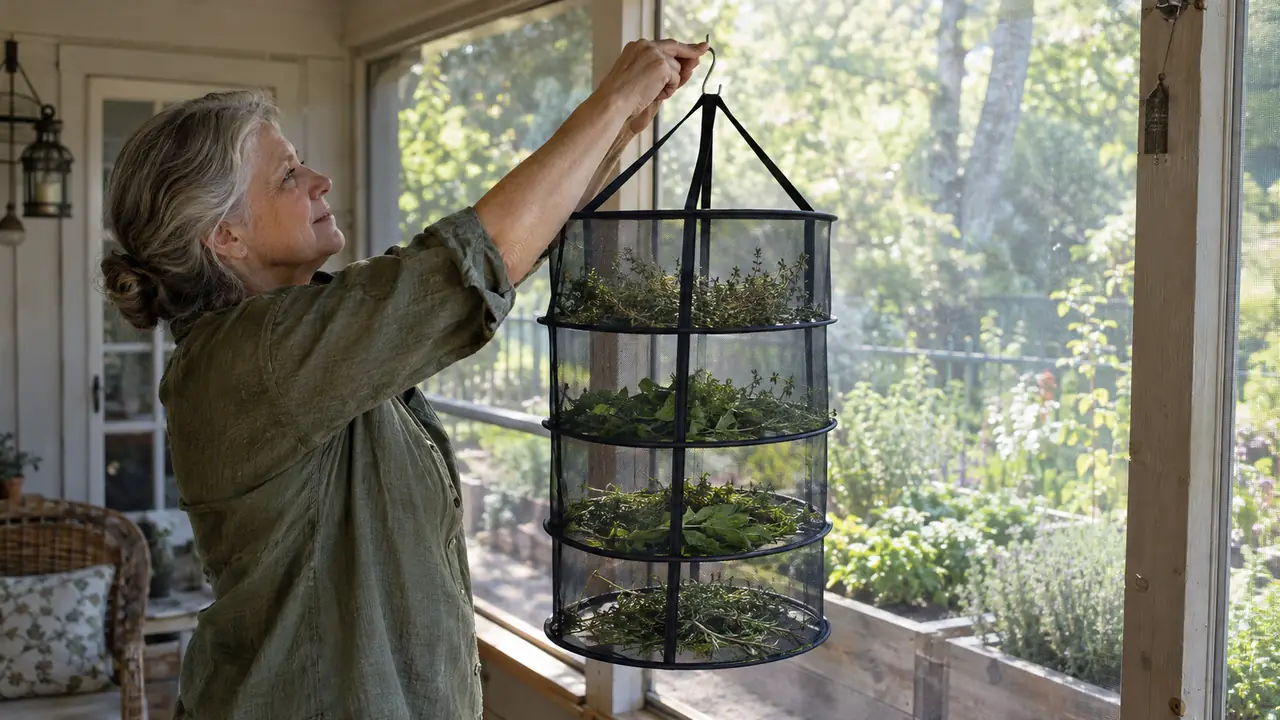
The first time I hung the Desy & Feeci 4-Layer Herb Drying Rack from the hook on my back porch, I did not expect much. I had spent twenty years drying peppermint and lemon balm the way my grandmother did, tying stems into bundles and hanging them from the same hook with twine, and most years that worked well enough. But the summer before last, a humid stretch in August turned two bundles of chamomile gray with mold, and I lost the whole harvest. I hesitated before buying the rack, because I have a drawer full of gadgets that promised to make homestead tasks easier and mostly did not. But a mesh rack is not a gadget. It is a basket with air around it, and that is the whole idea.
This review is about what happened after a full season of using that rack, from the first peppermint cutting in late May to the last calendula flowers in October. I am Marlene, I am 63, and I have been growing and drying kitchen and tea herbs in Virginia's Shenandoah Valley for about twenty years. I do not write about products I have not lived with, and I do not make promises I cannot back up with what I saw on my own porch.
The Quick Verdict
If you dry herbs by the armful, the four mesh tiers earn their keep. Herbs dried faster than bundles, stayed clean, and not one batch molded in a full season on my porch.
Amazon Check Today's Price →A full season of drying, one collapsible rack.
Four mesh tiers hang from a single hook, so a whole harvest can dry at once without touching the counter or the floor. I used mine from late May through October, and it is still going strong.
Amazon Check Today's Price on Amazon →How I've Used It
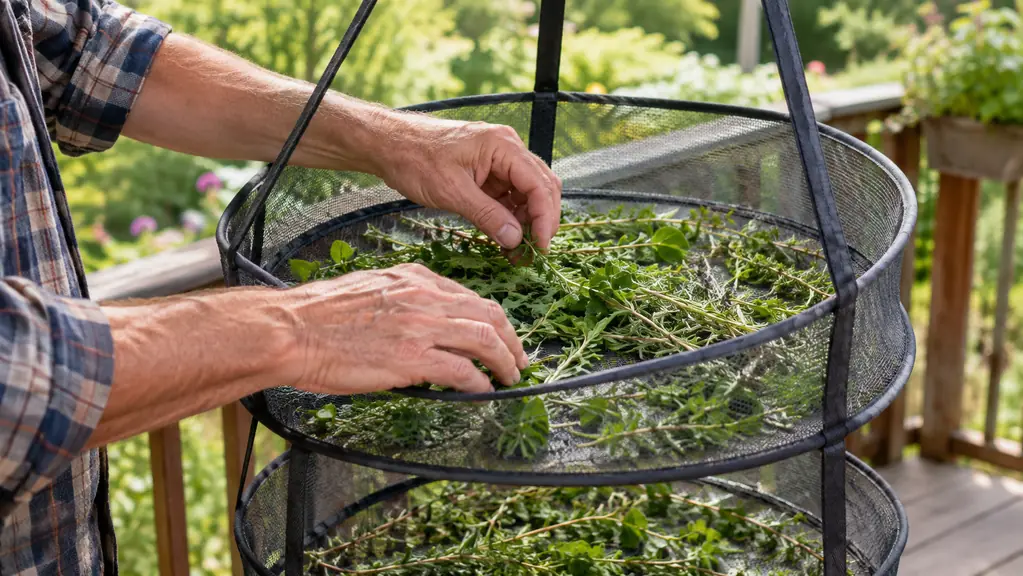
My routine never varied much. I picked herbs in the morning after the dew dried, rinsed them in a big bowl of cool water, and shook each handful hard over the sink. Then I spread the sprigs on a clean dish towel for an hour so the surfaces dried, because wet herbs in a closed mesh layer will sweat. Once they were dry to the touch, I loaded the rack from the top tier down, laying the sprigs in a single loose layer, not packed on top of each other.
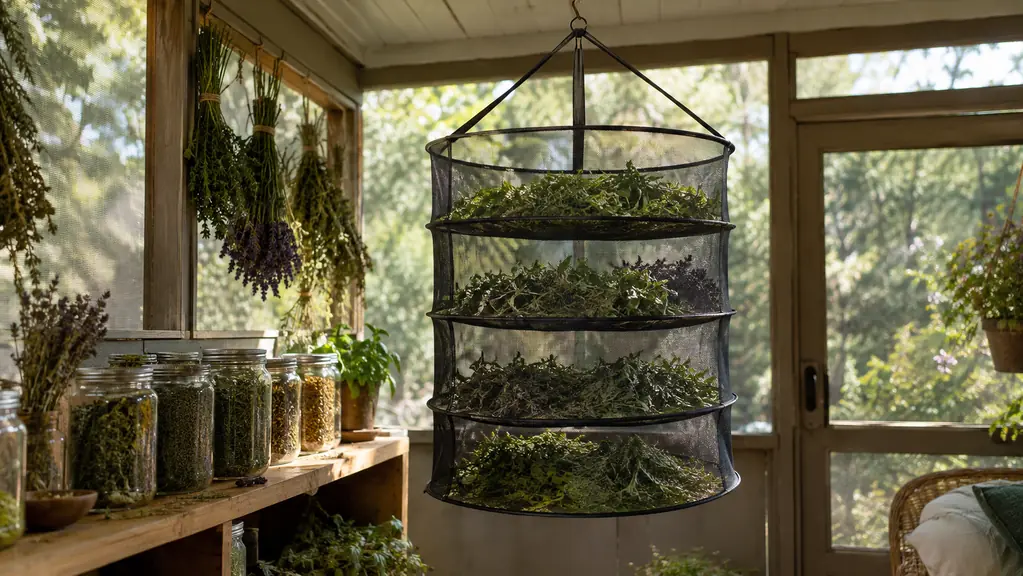
I hung the rack from a hook on the enclosed back porch, where it gets morning sun but no rain. Every couple of days I gave each tier a gentle turn, running my fingers through the herbs so the stems underneath got air. Peppermint and lemon balm dried in about five days in fair weather. Chamomile flowers took a little longer, closer to a week. By the end of the season I had filled eleven quart jars, and not one batch molded. I wrote the date on each jar as I filled it, and the earliest jars were the peppermint I picked in late May. By October I called this the rack that saved my harvest, and I meant it.
The rack spent the whole season hanging, from late May until the first frost. When I needed the porch for something else, I could take it down and fold it flat in under a minute. That sounds like a small thing, but it meant the rack did not become a permanent fixture I had to work around. It came out only when the harvest came in, and that is exactly what I wanted.
Why I Stopped Drying Herbs in Bunches
I want to be fair to the old way. Bundles of herbs tied with twine and hung upside down work, and they work for a reason. The herbs dry slowly, the oils stay in the leaves, and the stems act as a handle so you can pull the whole bundle down and strip it over a bowl. I dried herbs that way for years and most of it came out fine.
The problem is the places bundles fail. In humid weather, the inside of a thick bundle stays damp for days, and that is exactly what mold needs. The outside leaves dry and shatter while the inside stems are still green. And a bundle hanging in the open collects dust, which is not what you want in tea you plan to drink. I laid out the differences between mesh layers and bundles in a separate comparison, but the short version is that the rack fixed all three of those problems at once.
The mesh lets air reach every sprig, so drying happens evenly from the first day. Nothing touches anything else, so a moldy leaf cannot spread to its neighbor. And the herbs hang off the floor and away from the counter, which keeps them cleaner than anything I had tried before. I also noticed the herbs kept more of their smell. Bundle-dried peppermint smelled dusty by spring. The mesh-dried peppermint still smelled like peppermint when I opened the jar in January.
What the Four Layers Actually Do
The rack is about as simple as a tool can be. Four mesh tiers hang one below the other from a single hook, and each tier holds a loose layer of herbs. The mesh is open enough that you can see through it and air moves through it, but tight enough that small leaves stay put. I dried chamomile flowers on it without losing more than a few to the porch floor.
I used the tiers like a drying schedule. The top tier sits in the warmest air, so I put the thickest stems up there, things like rosemary and sage that take the longest. The lower tiers got the lighter harvests, peppermint, lemon balm, and chamomile. That way everything finished around the same time and I could clear the whole rack at once.
Capacity surprised me. I expected four layers to feel cramped, but a single harvest of peppermint from one raised bed filled only two tiers. The other two were free for calendula and thyme. For a garden like mine, four tiers is not a limit. It is more than enough. By October I had dried every herb in my garden at least once, and the rack never felt like the bottleneck.
How It Held Up Over a Full Season
I am hard on garden tools, so I watched this Desy & Feeci rack the way I watch a new pair of pruners. The mesh took the weight of wet herbs without stretching out of shape. The layers hung level all season, and the hook held steady even when the rack was full. I did not treat it gently. I loaded it, unloaded it, took it down, folded it, and put it back up dozens of times. I checked the stitching at the corners every time I folded it, the way I check the handles on a good basket, and nothing ever pulled loose.
The only wear I noticed was on the loop at the top where it hangs from the hook. After a few months of daily use, it looked a little fuzzy, so I started using a carabiner to spread the weight. That is a simple fix, and it is the kind of thing I would mention to a friend. Everything else, the mesh, the stitching, the way it folds, looked the same in October as it did in May.
Cleaning was simple. At the end of each drying batch, I took the rack outside, gave it a few good shakes to knock out loose bits, and wiped the mesh with a damp cloth. Twice during the season I rinsed it in the sink with a drop of mild dish soap and hung it back up to dry. It air dried in an hour and was ready for the next harvest.
Where It Falls Short
No tool is perfect, and I would not tell you this one is. The rack needs a place to hang where air moves. On my enclosed porch, that meant a hook near the window, because a corner with still air dries herbs slower no matter what you hang there. If you do not have a hook, or a door frame, or a rod you can hang it from, you will need to set one up first.
Humidity is the other limit. In a wet stretch, even the mesh rack took longer, and I learned to wait for a dry day to harvest rather than fill the rack with damp air. One rainy week in July I hung a half-filled rack anyway and the chamomile took ten days. I did not make that mistake twice. I also learned not to overload a tier. A single loose layer dries in days. Two layers packed together dry in a week and risk the same mold I was trying to avoid. The rack rewards patience, not cramming.
And it is not the right tool for whole plants with thick woody stalks. I dry those on a clothesline in the shed. The rack is for the leafy harvest, the tea herbs and culinary herbs you use in the kitchen. Once I stopped trying to make it do everything, it did its actual job beautifully.
How I Store What the Rack Dries
The rack does its job in the first week, but the storage is where you win or lose the harvest. I strip the dried leaves from the stems over a big bowl, crumble them with my fingers, and pack them into quart mason jars with tight lids. I keep the jars on a wooden shelf in the pantry, out of direct light, and I label each one with the herb and the month.
That routine is why the rack mattered so much to me. Herbs that dry evenly and stay clean keep their color and their smell, and mine kept both from May to October. I reached for jars of peppermint all winter and they smelled like the garden in July. The rack did not do the storing, but it made the storing worth doing.
What I Liked
- Four mesh tiers dry a whole harvest at once without taking up counter space.
- Air moves around every sprig, so herbs dry evenly and mold has nowhere to hide.
- Folds flat when the season ends, so it stores in a drawer or a tote.
- Held up to daily use all season; the mesh and stitching looked the same in October as in May.
- Simple to clean with a shake and a damp cloth.
Where It Falls Short
- Needs a sturdy hook in a spot with moving air; still air means slow drying.
- Humid stretches slow everything down, so you have to pick your harvest days.
- Not made for thick woody stalks or whole plants.
- You have to resist overloading a tier, because packed layers dry unevenly.
The peppermint that took nine days to dry on a string in August dried in five on the mesh, and not one batch molded all season.
Who This Is For
Buy this rack if you grow more herbs than you can use fresh and you want to keep them for tea and cooking. It is for the person who harvests by the armful, not by the sprig. It is for the gardener who has lost a bundle to mold in a humid year and wants air around every stem. My grandmother dried her herbs on screens stretched across chairs in the spare room, and this Desy & Feeci rack is the same idea with a hook on top. If that sounds like your kind of kitchen, you will like this one. And if you are still deciding whether drying your own herbs is worth the trouble, I put together a list of ten reasons that might help you decide. But if you already know you want to dry them, this rack is the piece of equipment I would start with.
Who Should Skip It
Skip it if you dry only a few sprigs at a time and a paper bag or a windowsill is enough. Skip it if you have nowhere to hang it, because it needs a hook or a rod and a little moving air. And if you want herbs dry in hours instead of days, an electric dehydrator is the better tool. I use one for mushrooms and for herbs I want in a hurry, and it does a fine job. It just sits on the counter, while the rack folds into a drawer. The rack is patient, and it will not rush a wet harvest. For me, patience is exactly what I have in October, and the rack is what I reach for.
Ready to dry this season's harvest the easy way?
Four mesh tiers, one hook, and a full season of herbs that come out clean and dry. That is what the Desy & Feeci rack gave me, and I would buy it again.
Amazon Check Today's Price on Amazon →