
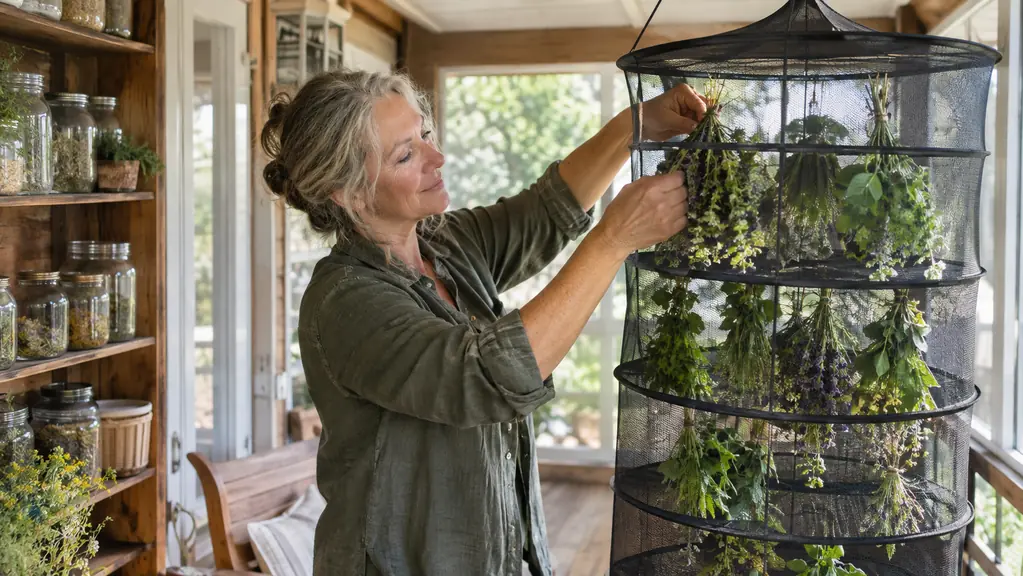
I started drying herbs the way my grandmother did, tying bunches with kitchen twine and hanging them from the porch ceiling. It worked, but it took up space, and every year a few sprigs would end up moldy where they touched. A few seasons back I switched to a mesh hanging rack, the Desy & Feeci 4-Layer Herb Drying Rack, and it changed my whole routine. Not because it does anything magical. It just gives every sprig room to breathe, and that is what drying is really about.
If you have ever tried to dry herbs and ended up with a brown, musty bundle, you know the problem. The flavor and the color live in the oils in the leaves, and those oils survive when air moves around the plant and the plant dries quickly. They fade when herbs sit in their own moisture. The whole job is to get the water out before mold gets a start. A hanging rack with mesh layers does that better than a flat basket, because air reaches the leaves from every side.
This guide walks through the way I actually do it, from the morning I cut the stems to the day the jars go on the pantry shelf. It is not the only way, but it is a way that works, and it has worked for me for about twenty years. I learned it from my grandmother and I have been growing and drying herbs in the Shenandoah Valley ever since.
Dry This Year's Harvest Without the Guesswork
The Desy & Feeci 4-Layer Herb Drying Rack gives every sprig its own air, with four mesh layers that collapse flat for storage. It hangs anywhere out of direct sun and holds a full morning's harvest. See today's price on Amazon and read what more than 4,200 reviewers say.
Amazon Check Today's Price on Amazon →Why Dry Your Own Herbs at All
I grow peppermint, lemon balm, chamomile, calendula, thyme, rosemary, and sage in four raised cedar beds beside the back porch. The garden gives me more than I can use fresh, and drying is how I keep that harvest for winter tea and cooking. Dried peppermint from my own garden tastes brighter than anything I have bought in a jar, and I know exactly when it was picked and how it was dried.
There is also the money side. A packet of seeds costs less than one small jar of dried herbs at the store, and one healthy plant gives you more than that jar holds. The work is simple once you have a system, and the system is mostly about air and patience.
And there is the pleasure of it. A shelf of jars you dried yourself, labeled in your own handwriting, is a small thing that feels like a real accomplishment every time you reach for it. In February, when the garden is asleep, that shelf is the whole point.
Step 1: Harvest at the Right Time of Day
The best time to cut herbs is mid-morning, after the dew has dried but before the sun is high. That is when the oils that carry the flavor and scent are strongest. Cut in the heat of the afternoon and the leaves wilt fast. Cut while the dew is still on them and you bring extra water into the rack, and water is exactly what you are trying to remove.
Use clean scissors or shears and cut healthy stems about six to eight inches long. For most leafy herbs, cut just above a pair of leaves so the plant keeps growing. Skip stems that have flowered unless you want them for tea. Flowering stems are fine for chamomile, but for thyme, rosemary, and sage you want the leaves.
If you are cutting a lot, carry a basket or a clean bucket lined with a towel so the leaves do not bruise on the way to the kitchen. Bruised leaves dry darker and lose flavor faster. And cut only what you can load into the rack the same day. Herbs that sit in a bucket overnight are already halfway to wilted.
Step 2: Wash and Dry Before They Hang
Give the stems a gentle rinse in cool water to wash off dust and any little insects that rode in from the garden. Shake them well, then lay them on a clean kitchen towel. Pat the tops gently and roll the whole bundle in the towel for a minute. You are not trying to dry the leaves completely, just to get the surface water off.
Then let the herbs sit on the towel for an hour or two, away from the sun, until the leaves feel dry to the touch. This is the step most people skip, and it is the one that prevents mold. Herbs that go into the rack dripping wet will steam in their own moisture, and steam is the enemy of a good dry.
I learned this the hard way with a big batch of lemon balm. I rinsed it, shook it once, and hung it right away. The leaves at the center of each bunch stayed damp, and mold found them before I did. Now nothing goes into the rack until it passes the dry-to-the-touch test.
Step 3: Load the Rack, Don't Crowd It
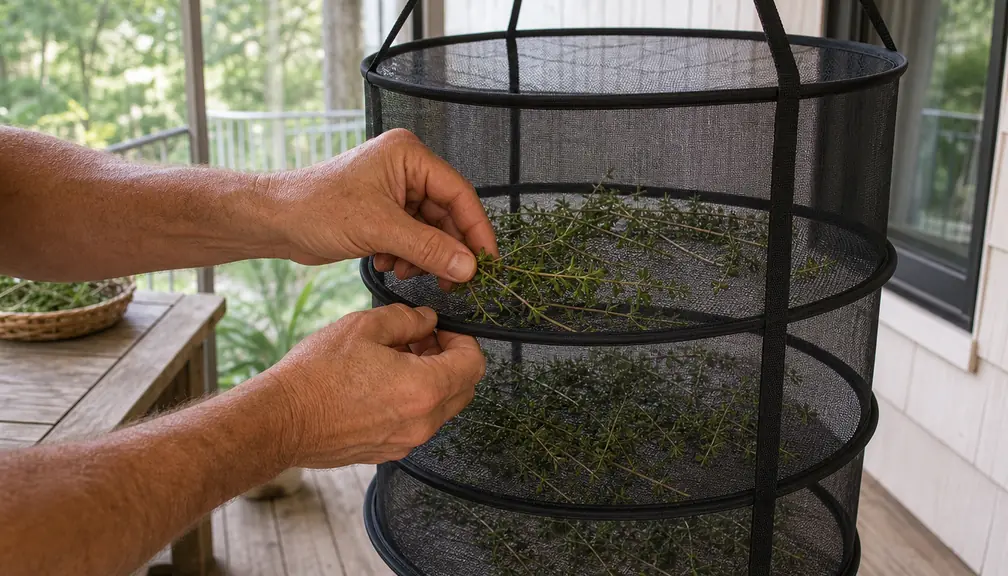
This is where the Desy & Feeci rack earns its keep. It has four mesh layers, each open enough to let air move through, and the whole thing hangs from a single hook. Instead of tying bundles, I lay the stems flat in the layers, one layer deep, with a little space between them. The mesh holds them in place and air reaches every leaf.
The four layers let me dry a full harvest at once. A flat basket holds the same amount, but the herbs on the bottom sit in the moisture of the ones on top. In the mesh layers, each sprig gets its own air. That is the difference between herbs that dry in about a week and herbs that take twice as long and smell faintly of hay.
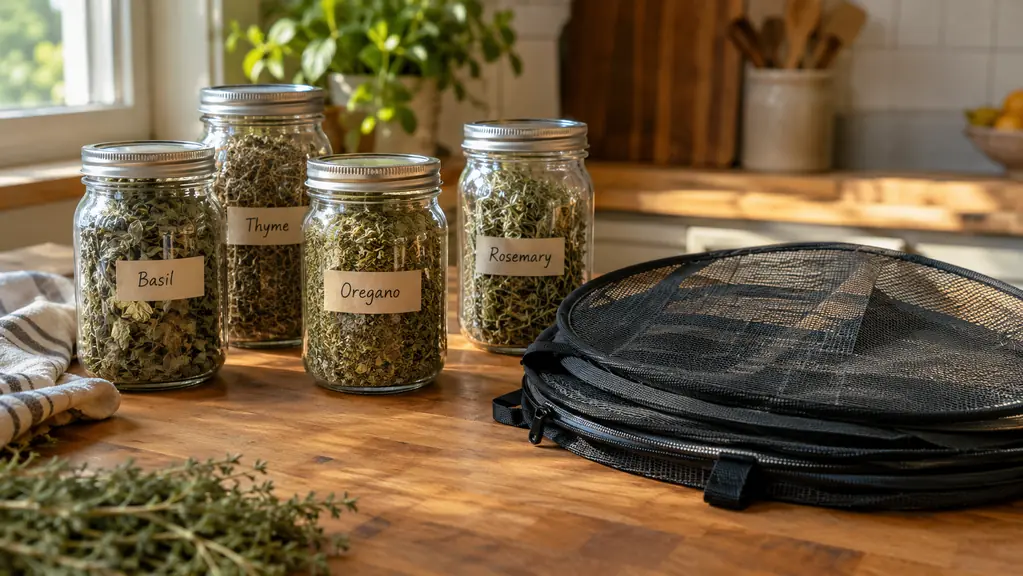
The rack collapses flat when you are done, which matters in an old farmhouse kitchen. Mine hangs on the enclosed back porch most of the summer, and when the season is over it folds down to nearly nothing and goes in the pantry. It is one of the few pieces of drying equipment I actually reach for every year.
Step 4: Hang It Where the Air Moves
The spot matters as much as the rack. I hang mine on the enclosed back porch, out of direct sun and away from the kitchen stove. Direct sun fades the color and cooks the oils out of the leaves. A dark, dry, airy place is what you want. A spare room, a covered porch, or even a closet with the door cracked open can work.
Humidity is the thing to watch. If the air is damp, herbs do not dry, they rot. On muggy weeks I run a small fan across the room on low, not aimed at the herbs, just moving the air. I check the rack every day. Herbs that are ready come off, and anything that looks damp gets spread out more or moved.
Keep the rack out of reach of little hands and curious pets if you have them. My grandmother hung her herbs high, and she had her reasons. A fallen rack is a mess, and a fallen rack full of half-dry herbs is a whole afternoon gone.
Step 5: Test, Strip, and Store
After about five to ten days, depending on the weather, the herbs are ready. The test is simple. A dry leaf crumbles between your fingers. A dry stem snaps instead of bending. If the leaves are still bendy, they need another day or two. If the leaves are crumbly but the stems are still pliable, strip the leaves and let the stems finish on their own.
Strip the leaves from the stems over a clean bowl. I do this at the butcher-block table, usually with a cup of tea nearby. I keep some herbs whole and crumble others, depending on how I plan to use them. Whole leaves keep their oils longer, so I store most of mine whole and crumble them at the moment I use them.
Put the dried herbs in clean glass jars with tight lids. Label every jar with the herb and the date, because dried rosemary and dried thyme look alike once they are crumbled, and you will not remember in February which is which. Keep the jars out of direct light. Used this way, most of my dried herbs keep their strength for about a year.
What Can Go Wrong (and How to Fix It)
Mold is the most common problem, and it almost always comes from moisture. Either the herbs went into the rack damp, or the air where they hung was too humid. The fix is to start drier and hang somewhere with more airflow. If you see gray fuzz on any sprig, pull that sprig out right away so it does not spread to the rest.
The other common problem is herbs that dry so slowly they lose their color and smell like hay. That happens when the layers are packed too tight or the spot is too dark and still. Spread the herbs out, move the rack, and give it a few more days. Slow drying is not ruined drying, but you want to catch it early.
What Else Helps
If you live somewhere humid, a dehydrator is a faster option, but it uses electricity and counter space, and it takes the porch out of the picture. The hanging rack costs nothing to run and does its job while you go about your day. I use the rack for leafy herbs and save the dehydrator, when I borrow one, for thick stems and roots that take forever in the air.
For herbs that drop their seeds, dill and fennel come to mind, tie the stems and hang the bundle head-down inside a paper bag. The seeds collect in the bag as they dry, and you do not lose half of them on the floor. And do not dry strongly scented herbs in the same layer. Mint will make everything taste like mint, and not everyone wants minty oregano.
Keep a small notebook. I write down what I hung, the date, and how long it took to dry. After a couple of seasons you will know exactly how your house behaves in July versus September, and you will stop guessing.
One more thing, and I say it every time it comes up. If you are drying herbs for tea and home remedies, remember that herbs are gentle but they are not nothing. Peppermint and chamomile are fine for most people, but if you take medication, if you are pregnant, or if you are drying herbs for a child, it is worth a quick conversation with your doctor. I am not trying to scare you. I just want you to enjoy your herbs for a long time.
The whole job is to get the water out before mold gets a start. If the stem bends, it is not dry. If it snaps, it is ready for the jar.
The Routine That Works for Me
My routine is the same every summer. I harvest mid-morning, rinse and towel the herbs, load the Desy & Feeci rack in loose single layers, hang it on the back porch, and check it every day. Ten days later I am filling jars that will carry me through the winter. It is not complicated, and it does not need to be.
The best part is that none of this is new. My grandmother dried herbs the same way, minus the mesh rack. She tied twine and hoped for dry weather. I hang four layers of mesh and get the same result with less fuss. The herbs do the work. The rack just gives them room.
Hang It Up and Let the Air Do the Work
The Desy & Feeci 4-Layer Herb Drying Rack has held up through several seasons on my porch, and it folds flat the rest of the year. If you grow herbs, this is the simplest way to keep them. Check today's price on Amazon.
Amazon Check Today's Price on Amazon →